UFOCaptureV2 Quick Start Guide
Index
1. Compatibility test
- Confirm the capture hardware has been normally installed and runs with Windows Movie Maker or Windows Media encoder at desired resolution. (Both free programs can be obtained from Microsoft corp.).
- Confirm the video clip captured though your capture hardware can be replayed by Windows Media Player.
- If you have trouble so far, please do not proceed , and solve the problems first.
2. Installation of UFOCaptureV2
- Download UFO2xx.zip.
- Expand zip package and get UFO2 directory.
- Confirm UFO2.exe exist in UFO2 directory.
- If you use Windows XP sp2 or later, you may need off the block at the property window of UFO2xx.zip before expanding.
- Move UFO2 directory to anywhere you want to use as execution directory (ex. C:\Program Files\UFO\UFO2).
3. Confirmation of the capture driver.
- Stop other applications, get ready your video equipments, then Run UFO2.exe .
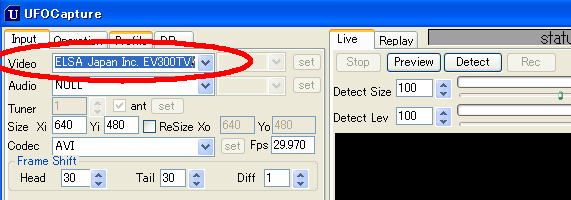
- Confirm or select your capture hardware driver at the Video drop down list box in Input sheet.

- The name of the driver may differ a little from the official name of the hardware.
- If you use IEEE1394(DV) as capture device, select "Microsoft DV Camera and VCR"
- The driver names appear only when they are ready and not in use.
4. Previewing test.
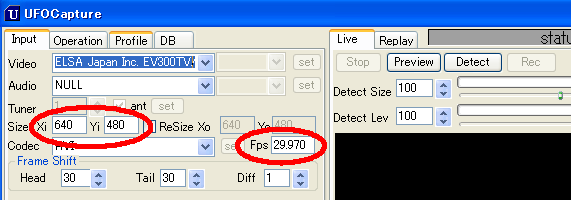
- Set resolution of video(Xi, Yi) and frame rate(Fps) which are supported by your driver.

- Example of general settings..
| Input Signal |
Videoformat |
Safety Setting |
High load Setting |
| analog |
NTSC |
Xi=320,Yi=240,Fps=29.97 |
Xi=640,Yi=480,Fps=29.97 |
| PAL |
Xi=352,Yi=288,Fps=25.0 |
Xi=704,Yi=528,Fps=25.0 |
| IEEE1394(DV) |
NTSC |
Xi=360,Yi=240,Fps=29.97 |
Xi=720,Yi=480,Fps=29.97 |
| PAL |
Xi=352,Yi=288,Fps=25.0 |
Xi=720,Yi=576,Fps=25.0 |
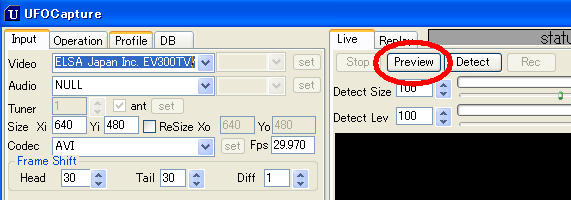
- Push Preview button in Live sheet, and confirm input video signal is shown in live windowB

-
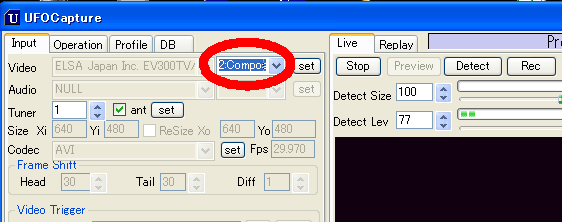
- When your capture hardware has multiple inputs, select prefer input pin in the combo box below during previewing.

- When you get error message, please refer here.
5. Manual recording test.
- Push Rec button in Live sheet, then recording will start.
- Push RecOff button (same position as Rec button), and recording will stop after a few seconds ( time shifted ).

-
- Click Replay tab to go to Replay sheet, DB sheet will be shown in right area.
- Click clip name(Mxxxxxxxx_xxxx*) shown in the list area, snap shot still image will appear in replay window.
- Click ">" button in Replay sheet, recorded clip will be replayed.

6. Detection test.
- Go back to Live sheet and push Detect button.
- Let input video have some change(ex. move hands before camera), then recording will start automatically and stop when the change is seized.
- Replay and confirm the results. If you got appropriate video clips and still images, all test was passed.
7. True operation
- You may need stored settings, sensitivity tuning, assignment of output directory, area mask setting and etc to operate appropriately according to your observation purpose. Please refer here and do tuning.
- Registration of license key will be needed when using over free trial period. Please get license and and do registration operation..
Index


